How to Build a Jewelry Website with WordPress and WooCommerce (Free Tools)
 By Saurabh Pandey · · 4 min read
On this page
- Step 1: Set up hosting, WordPress and WooCommerce
- Step 2: Choose an elegant, fast theme
- Step 3: Plan your catalog structure
- Step 4: Create products that answer every question
- Step 5: Photography makes or breaks the store
- Step 6: Set up payments and shipping
- Step 7: Build trust before you ask for money
- Step 8: Add pages that reduce returns and attract searches
- Step 9: Test, launch and grow
- Keep the store secure
Jewelry is one of the hardest products to sell online and one of the most rewarding when it is done well. Customers cannot touch the piece, judge the shine or feel the weight, so your website has to do that work: sharp photos, clear materials information and policies that make a first purchase feel safe.
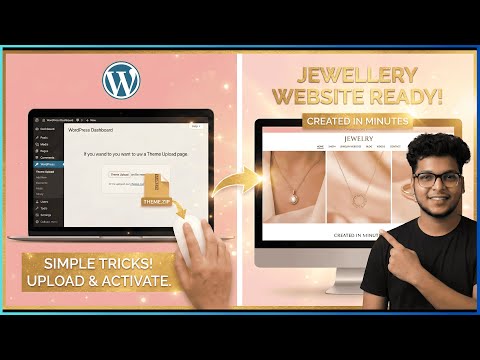
WordPress with WooCommerce is a flexible, low-cost way to build exactly that, and you can start with free tools. In the video above I build a complete store using a ready-made template. This guide explains each step and the decisions that make a jewelry website convert.
Step 1: Set up hosting, WordPress and WooCommerce
- Install WordPress on your hosting (follow the Hostinger WordPress setup guide if you are starting from scratch).
- Go to Plugins > Add New Plugin, search for WooCommerce, then install and activate it.
- Run the setup wizard: store address, currency, the kind of products you sell and which payment methods you want.
Step 2: Choose an elegant, fast theme
Look for a WooCommerce-compatible theme with generous white space, large product images and refined typography. Many themes include jewelry or fashion starter templates you can import with one click; that is the fastest way to get a polished layout.
Important: after importing a template, replace every demo image, text and product before launch. Demo content is often licensed only for previews, and leftover placeholder text makes a store look unfinished.
Step 3: Plan your catalog structure
A clear structure helps shoppers find pieces and helps search engines understand your store.
- Categories by type: rings, earrings, necklaces, bracelets, anklets.
- Attributes for filtering: metal (sterling silver, gold-plated, brass), stone, finish and size.
- Tags or collections for occasions: bridal, everyday, festive, gifts under a certain price.
Shoppers often search by occasion and budget, not just by type. "Bridal earrings" and "gifts for her" collections can become some of your best-performing pages.
Step 4: Create products that answer every question
Use simple products for one-off pieces and variable products when one design comes in several sizes or metals. Each product page should include:
- A clear title with the type and material, such as "Sterling Silver Hoop Earrings, 25 mm".
- A short, benefit-led description: how it looks and feels, and when to wear it.
- Specifications: metal, plating, stone, dimensions, weight and closure type.
- Size guidance for rings and bracelets, with a link to your size guide.
- Care instructions and what is included, such as a gift box or certificate.
- Delivery time and returns information near the add-to-cart button.
Only state what you can back up. If you mention hallmarking, purity or certification, follow the rules that apply where you sell (for example, hallmarking requirements for gold in India) and keep the documentation.
Step 5: Photography makes or breaks the store
Jewelry is small and reflective, so photos matter more than any design choice.
- Light: soft, diffused daylight or a light box. Avoid direct flash, which creates harsh reflections.
- Stability: use a tripod and your camera's timer for sharp close-ups.
- Angles: front, side, back, clasp or closure, and a macro close-up of stones and texture.
- Scale: at least one photo on a hand, ear or model so customers understand the real size.
- Consistency: the same background and aspect ratio across the catalog.
- File size: compress images and use WebP so pages stay fast. See our speed guide.
Step 6: Set up payments and shipping
- Enable the payment methods your customers trust: cards, UPI and wallets in India; cards and PayPal internationally.
- Think carefully about cash on delivery for higher-value pieces. Many jewelry stores limit it because of return-to-origin costs.
- Create clear shipping zones and rates, and consider insured shipping for expensive items.
- Show delivery times on product pages and in the cart.
Step 7: Build trust before you ask for money
- About page: your story, your workshop or sourcing, and real photos of the people behind the brand.
- Clear policies: returns, exchanges, shipping and privacy, linked in the footer.
- Materials page: explain plating, sterling silver, stones and hypoallergenic options honestly.
- Genuine reviews: ask customers for reviews and photos after delivery. Never write fake reviews.
- Easy contact: WhatsApp, email and a contact form, with expected reply times.
Step 8: Add pages that reduce returns and attract searches
- Ring size guide: clear measuring instructions and a size chart.
- Jewelry care guide: how to clean and store each material.
- Gift guides: for weddings, anniversaries, festivals and birthdays.
- FAQ page: delivery, returns, customization, packaging and gift messages.
These pages answer the questions that stop people buying, and they give search engines more helpful content to rank.
Step 9: Test, launch and grow
- Place test orders with each payment method, then refund them.
- Check every product page on a phone, including zoom and variant selection.
- Write unique SEO titles and descriptions for categories and best-selling products.
- After launch, share new pieces on Instagram and Pinterest, collect reviews and keep adding helpful content.
Tip: launch with a focused collection of your best twenty or thirty pieces. A small, beautifully presented store converts better than a large, cluttered one, and you can add more as you learn what sells.
Keep the store secure
A store handles orders and customer data, so security is not optional. Keep WordPress, WooCommerce, your theme and plugins updated, use strong passwords with two-factor authentication and schedule daily backups. Our WordPress security checklist covers everything step by step. Prefer a hosted platform instead? Compare with our beginner's guide to Shopify.
Frequently asked questions
Can I build a jewelry website on WordPress for free?
The software is free: WordPress, WooCommerce and many good themes cost nothing. You still need to pay for hosting and a domain, and you may later choose paid extras such as a premium theme or specific plugins.
Is WooCommerce or Shopify better for a jewelry store?
Both work well. WooCommerce gives you full control, no platform subscription and a powerful content system for guides and blogs. Shopify is quicker to set up and handles hosting and updates for you, in exchange for a monthly fee.
How should I photograph jewelry for my website?
Use soft, diffused light, a clean background and a tripod. Shoot several angles, close-ups of stones and texture, and at least one photo on a hand or model to show real size. Keep every product photo the same aspect ratio.
Which payment methods should a jewelry store offer?
Offer the methods your customers already trust, such as cards, UPI or wallets in India and cards and PayPal internationally. For higher-value pieces, many stores limit or disable cash on delivery and use insured shipping.
What pages does a jewelry website need?
Beyond product and category pages, add a ring size guide, a care guide, a materials page, clear shipping and returns policies, an About page with your story and a contact page with WhatsApp or email.